How to Build Time Frames
1. Click on the Time Frame tile.

2. Click Add Time Frame.

Types of Time Frames:
- Domain Time Frames - are available for use by all users within the domain.
- User Time Frames - are set by the user.
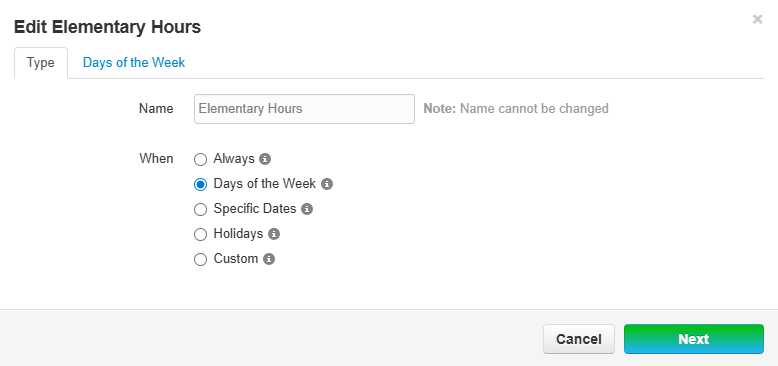
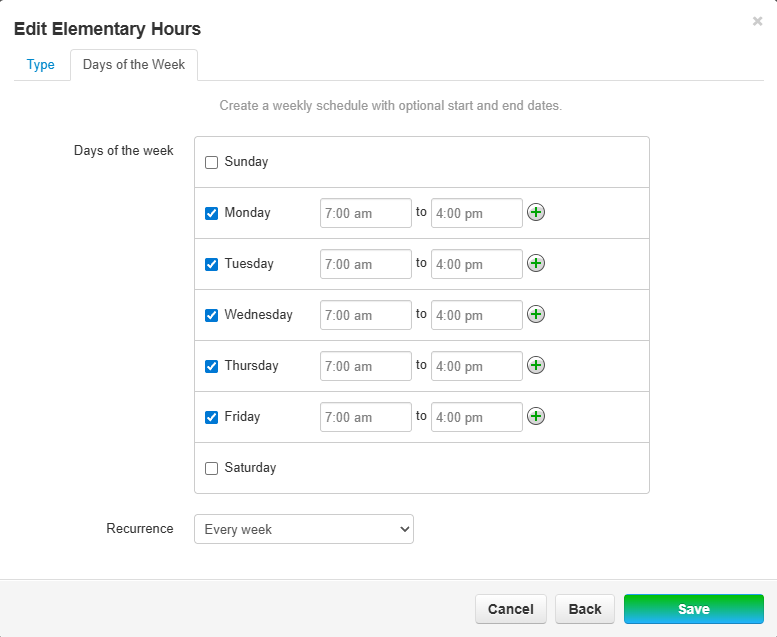
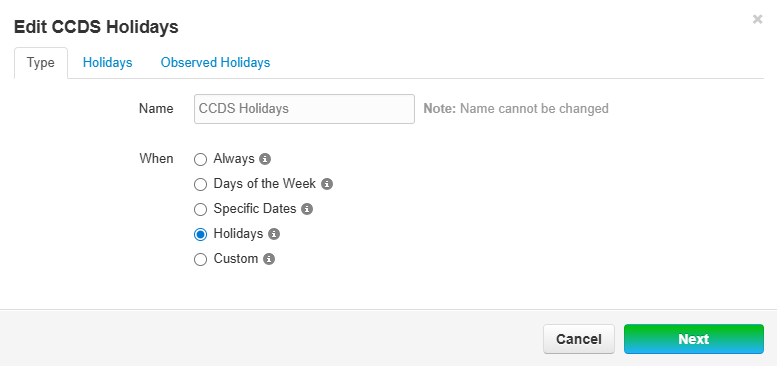
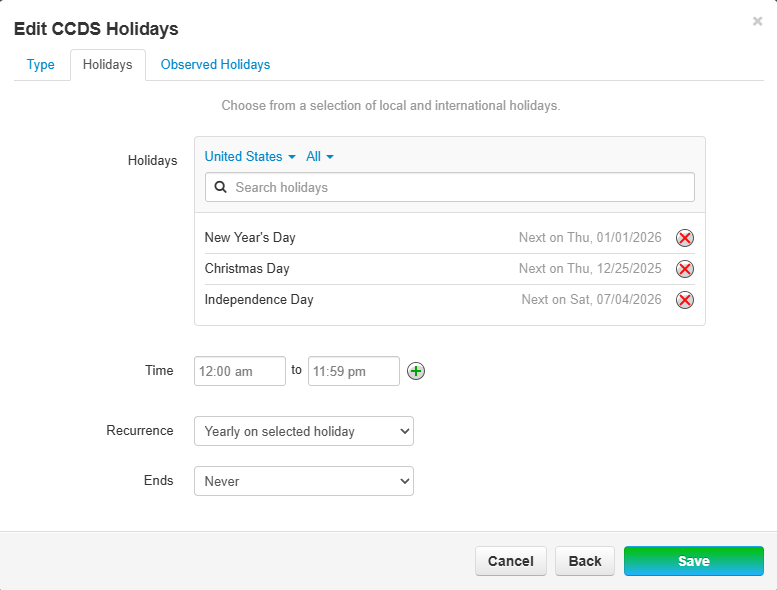
3. From the pop out window, add the Name and When of the Time Frame. Click Save.
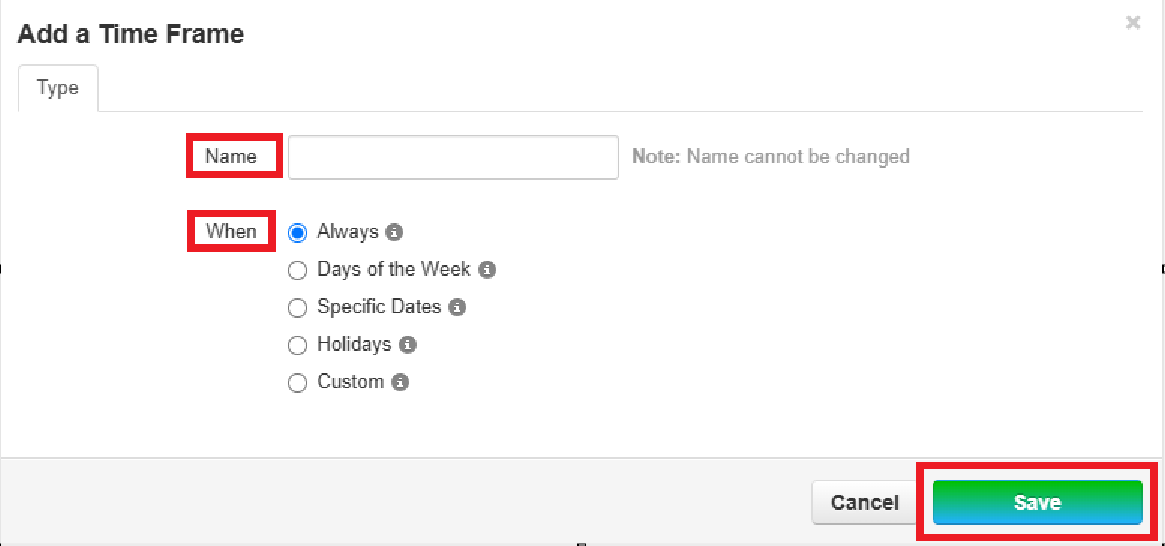
Some options require multiple steps. Remember to Save after EVERY step.
4. Time Frames can be viewed, added, edited, or deleted using these options.

Time Frames affect setting up your Auto Attendants (see documentation) and User's Answering Rules (see documentation)
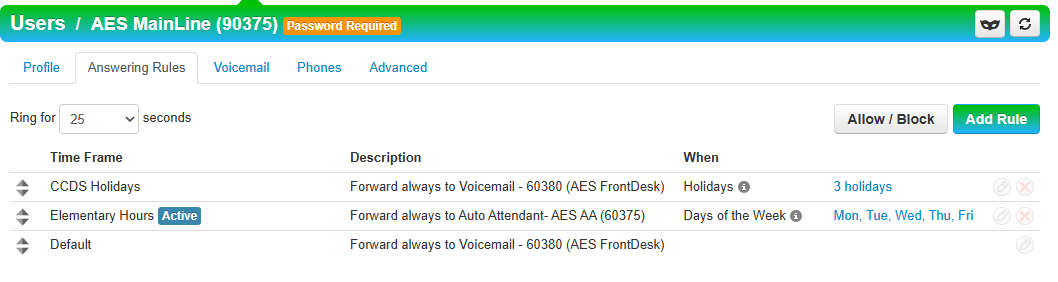
Office/School Hours Time Frame Example
The following example uses domain defined hours for an Elementary School. Elementary school would like the Main Line answered by Auto Attendant during office hours and go to voicemail on Holidays and Off Hours (Using the "Default" Time Frame as the off hours option).
Holiday Time Frame Example
Answering Rule Logic